


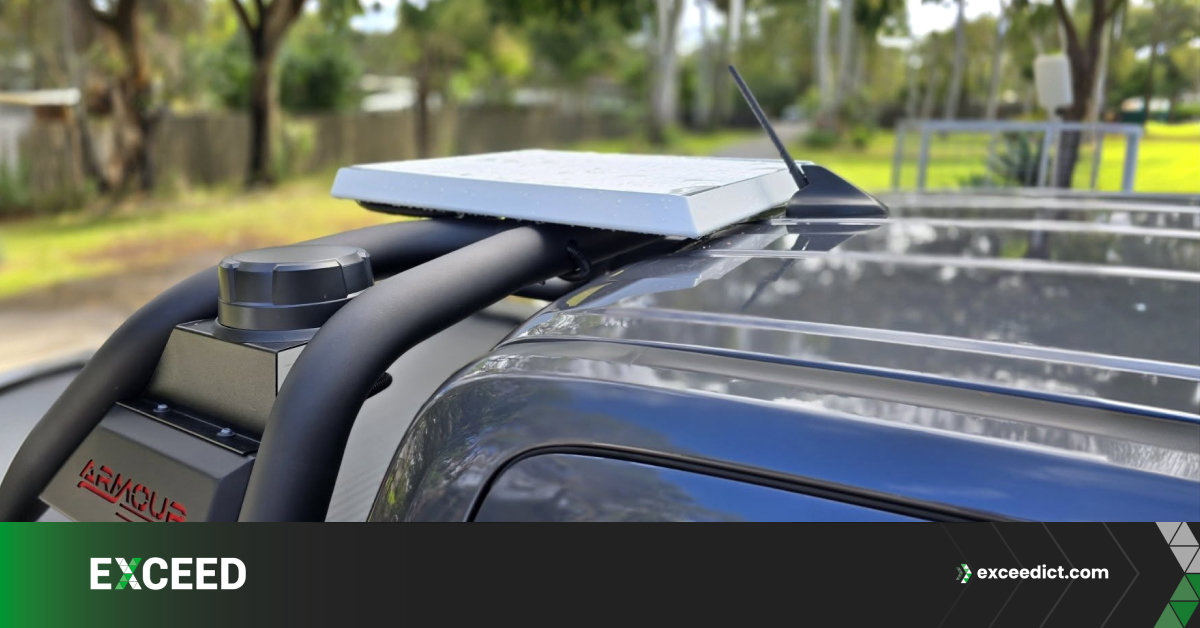
Reliable internet on the road is no longer a luxury for Australian travellers, remote workers, caravan owners, and 4WD enthusiasts. Whether you’re exploring the Outback, working from regional job sites, or travelling across the country, staying connected can be challenging once you leave mobile network coverage. The Starlink Mini solves this problem by delivering fast, low-latency satellite internet in a compact, portable device that is ideal for vehicles.
Unlike traditional satellite systems that require complex installations, the Starlink Mini features an integrated Wi-Fi router, low power consumption, and flexible mounting options, making it well suited for cars, SUVs, caravans, campervans, and 4WDs. With the right power setup and secure mounting solution, you can access reliable internet almost anywhere in Australia.
Why Use Starlink Mini in Your Vehicle?
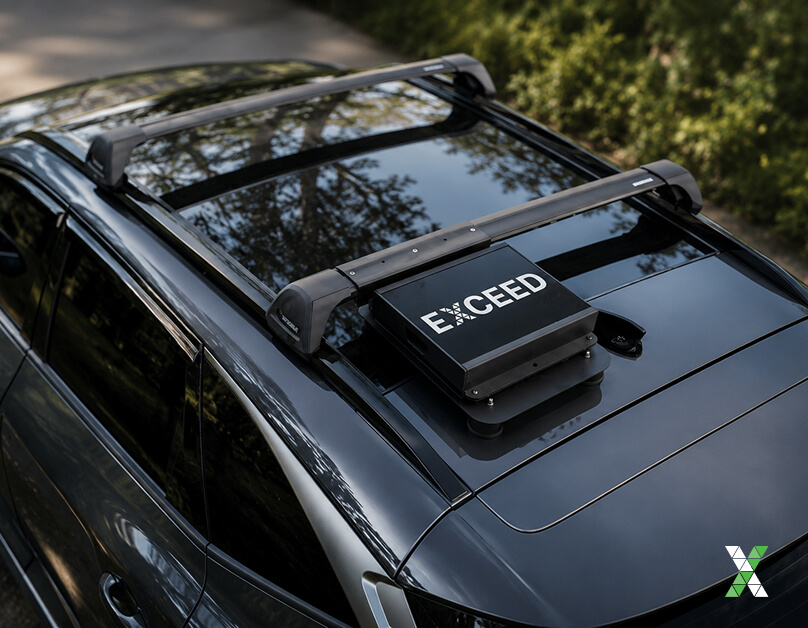 Australia covers vast distances where traditional mobile networks simply don’t reach. While 4G and 5G provide excellent coverage in metropolitan areas, many highways, national parks, mining regions, farms, and remote communities still experience limited or no reception.
Starlink Mini allows you to:
- Stay connected while travelling across Australia
- Work remotely from virtually any location
- Stream entertainment during camping trips
- Maintain communications during emergencies
- Access cloud applications from remote job sites
- Support digital nomad lifestyles
- Improve connectivity for caravans and campervans
Its compact design also makes installation significantly easier than previous Starlink models.
What You’ll Need Before You Begin
Before installing your Starlink Mini, ensure you have everything required for a successful setup.
Essential Equipment
- Starlink Mini Kit
- Active Starlink subscription
- Official Starlink App
- Stable 12V or USB-C power source
- Vehicle mounting solution
- Smartphone or tablet
- Optional auxiliary battery system
Having these ready before your trip makes installation much smoother.
Step 1: Choose the Right Starlink Plan
Before powering your device, activate your Starlink Mini using the official app.
For Australian travellers, the Roam Plan is generally the best option because it allows internet access while travelling throughout Australia.
Benefits include:
- National coverage
- Flexible travel
- Suitable for caravans
- Remote camping
- Road trips
- Mobile offices
- In-motion capability (where supported by your plan)
Complete activation before leaving mobile reception to avoid difficulties during setup.
Step 2: Download the Starlink App
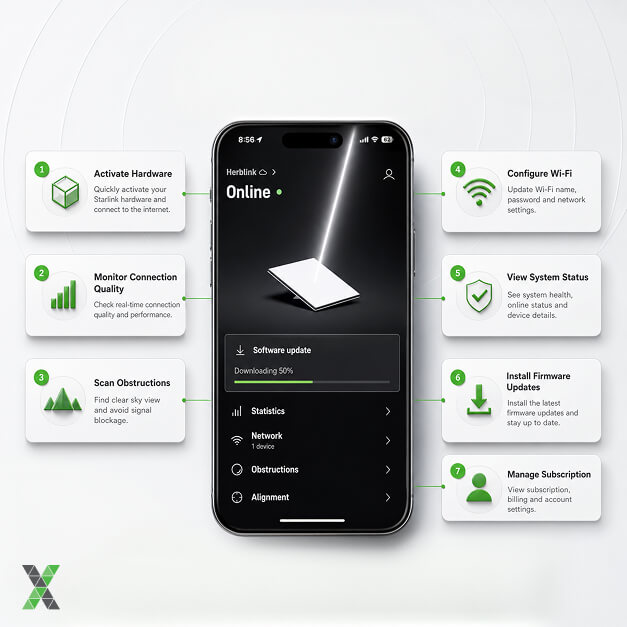 The Starlink App is essential for installation and ongoing management.
It allows you to:
- Activate your hardware
- Monitor connection quality
- Scan for obstructions
- Configure Wi-Fi
- View system status
- Install firmware updates
- Manage your subscription
Keeping the app updated ensures compatibility with the latest Starlink software.
Step 3: Choose the Best Mounting Location
Satellite internet relies on a clear view of the sky. Unlike conventional antennas, Starlink communicates directly with Low Earth Orbit (LEO) satellites, meaning even small obstructions can interrupt service.
Ideal Mounting Locations
- Vehicle roof
- Roof platform
- Roof rack
- Caravan roof
- Camper trailer roof
Avoid placing the dish beneath:
- Roof boxes
- Awnings
- Solar panels
- Large roof racks
- Tree branches
- Metal structures
Higher placement generally provides better satellite visibility.
Step 4: Select the Right Mount
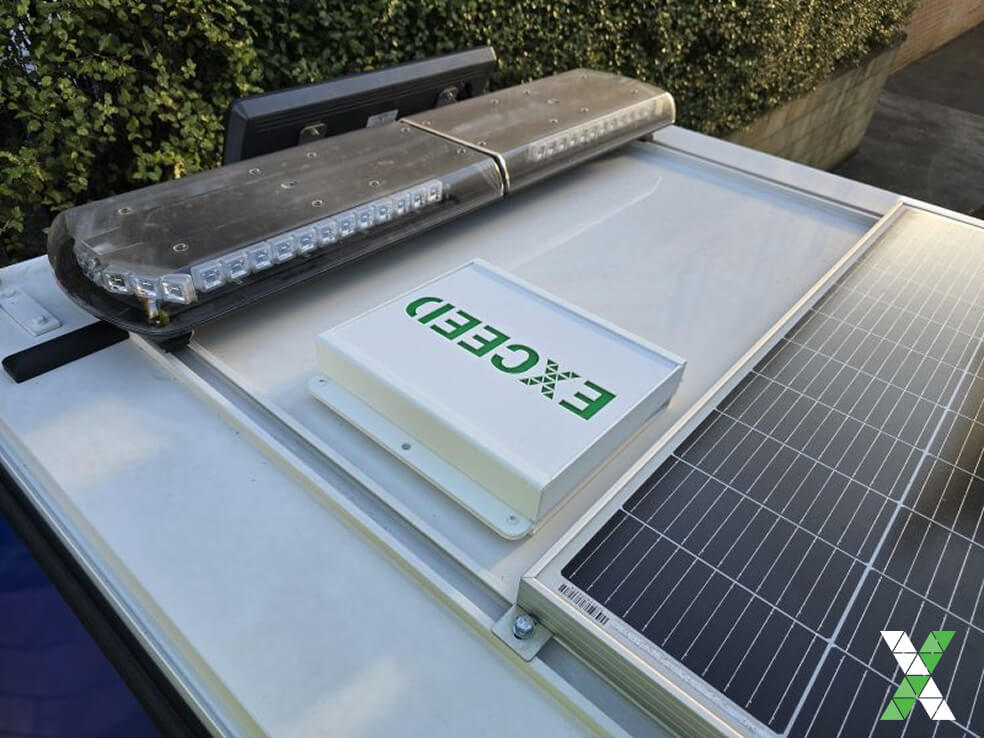
Australian drivers have several mounting options depending on their vehicle.
Magnetic Roof Mount
Perfect for:
- Steel roofs
- Temporary setups
- Weekend travellers
Advantages include:
- No drilling
- Easy installation
- Quick removal
- Portable
- Cost-effective
Heavy-duty rubber-coated magnets help protect your vehicle’s paintwork.
Roof Rack Mount
Ideal for:
- 4WDs
- Touring vehicles
- Work vehicles
- Camper conversions
Benefits include:
- Extremely secure
- Permanent installation
- Better cable management
- Reduced movement
- Suitable for rough roads
Adhesive Mount
Suitable for:
- Fibreglass roofs
- Aluminium canopies
Industrial-grade adhesive mounting plates provide a strong attachment point for magnetic brackets.
Suction Mount
Best suited for:
- Temporary travel
- Glass roofs
- Sunroofs
These are easy to install but are generally recommended when the vehicle is stationary rather than during extended highway travel.
Step 5: Power the Starlink Mini
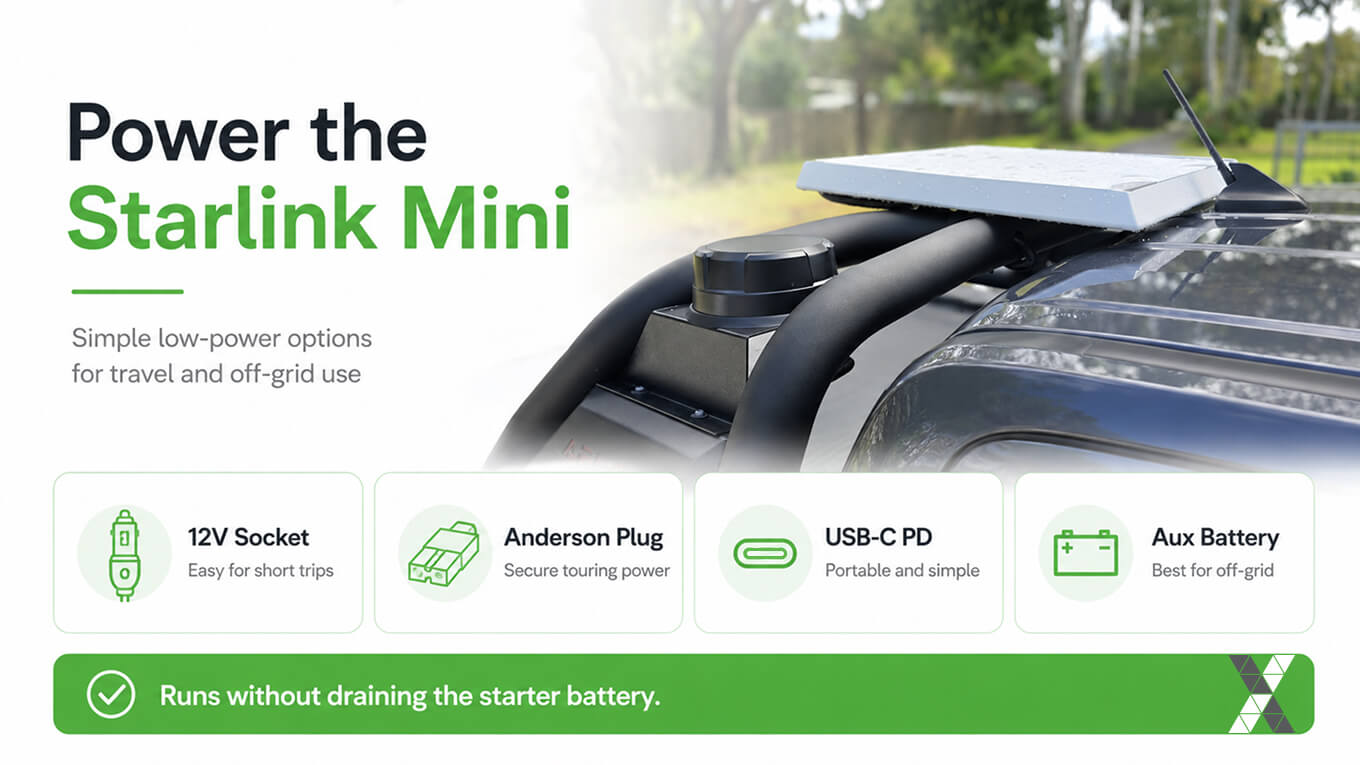 One of Starlink Mini’s biggest advantages is its low power consumption. Unlike previous models requiring bulky AC power supplies, the Mini can operate directly from DC power. Several power options are available.
12V Cigarette Socket
The simplest installation.
Suitable for:
- Rental vehicles
- Short trips
- Weekend camping
- Casual users
Simply connect using a compatible Starlink vehicle adapter.
Anderson Plug
Popular among Australian 4WD owners.
Advantages include:
- Reliable connection
- Less voltage drop
- Secure locking
- Suitable for corrugated roads
- Auxiliary battery integration
This is often the preferred option for long-distance touring.
USB-C Power Delivery
Starlink Mini supports high-output USB-C PD.
Benefits include:
- Portable power stations
- Battery packs
- Modern vehicle chargers
- Reduced wiring complexity
Ensure your charger supports sufficient wattage for reliable operation.
Auxiliary Battery Systems
For serious off-grid adventures, many travellers connect Starlink Mini to:
- Lithium batteries
- AGM batteries
- Dual battery systems
- Portable power stations
This keeps internet running without draining the vehicle’s starter battery.
Step 6: Route the Cable Safely
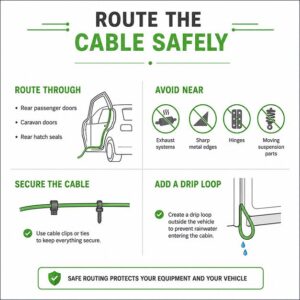 Proper cable routing protects both your equipment and your vehicle.
Temporary installations commonly route the cable through:
- Rear passenger doors
- Caravan doors
- Rear hatch seals
The rubber door seal compresses around the cable without causing damage.
Helpful Tips
Avoid routing cables near:
- Exhaust systems
- Sharp metal edges
- Hinges
- Moving suspension parts
Use cable clips or ties to keep everything secure. Adding a drip loop outside the vehicle also helps prevent rainwater entering the cabin.
Step 7: Power On the System
Once mounted and connected:
- Turn on your vehicle or power source.
- Connect the Starlink Mini.
- Wait for the system to boot.
- Allow the dish to establish communication with satellites.
The first startup may take longer while firmware updates are downloaded.
Step 8: Connect to Wi-Fi
When the system starts:
- Open Wi-Fi settings.
- Connect to the default STARLINK network.
- Open the Starlink App.
- Create your own Wi-Fi name.
- Set a secure password.
Once completed, reconnect your devices using the new network name.
Step 9: Check for Obstructions
Use the Starlink App’s obstruction scanner before every major trip.
The app identifies objects that could reduce signal quality, including:
- Trees
- Buildings
- Roof racks
- Poles
- Nearby vehicles
If obstructions are detected, simply reposition the dish for better performance.
Best Practices for Australian Road Trips
To maximise performance:
- Park in open areas whenever possible.
- Keep the dish clean.
- Regularly inspect cables.
- Secure loose wiring.
- Update Starlink software.
- Monitor battery voltage.
- Carry spare mounting accessories.
- Store the dish safely when not in use.
These simple habits help ensure reliable connectivity throughout your journey.
Common Installation Mistakes to Avoid
Many connection issues result from avoidable mistakes.
Avoid:
- Installing beneath roof racks
- Blocking the sky with gear
- Using insufficient power supplies
- Poor cable routing
- Ignoring obstruction warnings
- Loose power connectors
- Using damaged cables
- Forgetting software updates
Taking extra care during installation improves reliability and reduces interruptions.
Troubleshooting Connection Issues
If Starlink Mini isn’t connecting:
- Confirm your subscription is active.
- Check all cable connections.
- Restart the device.
- Review obstruction alerts.
- Verify adequate power supply.
- Update firmware through the app.
- Ensure the dish has a clear view of the sky.
- Reboot your router if necessary.
Most connectivity issues can be resolved within a few minutes.
Why Australian Travellers Choose Starlink Mini
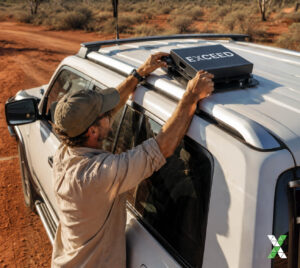 Starlink Mini has quickly become a favourite among:
- Caravan owners
- Campervan travellers
- 4WD enthusiasts
- Remote workers
- Emergency response teams
- Field technicians
- Mining contractors
- Farmers
- Content creators
- Digital nomads
Its portability, efficient power consumption, and impressive satellite performance make it an excellent solution for staying connected almost anywhere in Australia.
Conclusion
Installing a Starlink Mini in your car is a practical way to enjoy reliable internet while travelling across Australia. With the right vehicle mount, stable DC power source, and a clear view of the sky, you can establish a dependable satellite connection in just a few simple steps.
Whether you’re exploring remote national parks, working from regional locations, touring the country in a caravan, or managing field operations, Starlink Mini provides the flexibility and performance needed to stay connected wherever your journey takes you. By following best practices for mounting, powering, and maintaining your setup, you’ll enjoy consistent, high-speed connectivity across Australia’s diverse landscapes.
Need a Professional Starlink Mini Vehicle Installation? Whether you’re touring Australia in a 4WD, travelling in a caravan, managing a commercial fleet, or working remotely, a professionally installed Starlink Mini ensures reliable satellite internet wherever your journey takes you.
Contact our team today for expert advice, custom mounting solutions, and professional Starlink Mini installation tailored to your vehicle and travel needs.
Call us on 1300 832 639 or simply search “Exceed ICT” on Google Maps to find a location near you and connect with our team today.
We also provide Managed Services, Asset Management, IoT Helpdesk, Fleet Management, Project Management, Telecoms Expense Management.
Improve Your Business Core values, Business Consulting, Network Management, Telstra Adaptive Mobility, Device Enrolment, and many more Solutions.
Find us (Exceed ICT) on Google map.